
Microsoft has been released a new features console mode in Windows 10 that can be used replace the default lock screen, welcome and shutdown and graphical login UI screen with a text console terminal on a black screen. This UI will look like the command prompt UI and you can set a login permit for this. However, the Windows 10 lock screen and login screen are exciting with marvelous pictures that get updated daily. Lots of user finds them aggravating. High qualities pictures, the lock screen takes some time to load and then often to bring the login screen. If you are not ready to compromise, then you can simple remove the login screen and lock screen permanently and save your time.
How To Use Console Mode Windows 10 Login
To use the Console Mode Login screen or Windows 10, you can use ESC button of the key board to search back to a menu, while you can use the Arrow keys to find through the choices which are mostly arranged vertically. Lastly Press the Enter key to select an option and signing in using the PINs and Passwords to login.
How To Enable Console Mode in Windows 10:
- Press Win+ R to open Run Window. Type regedit and Press Enter to open Registry Editor.
- Then Search to the following position.
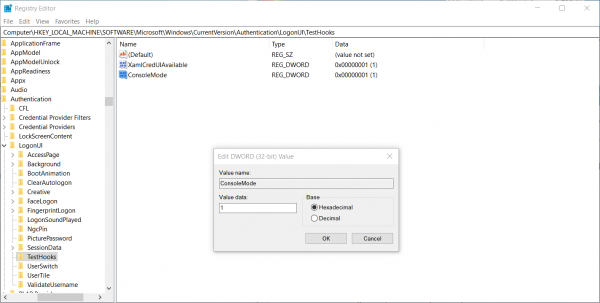
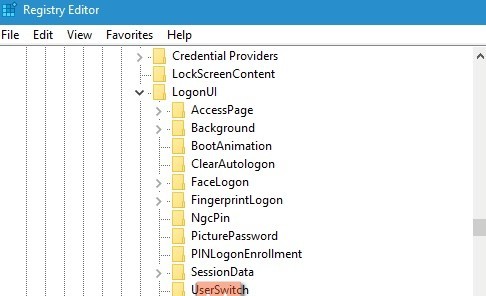
HKEY_LOCAL_MACHINE\SOFTWARE\Microsoft\Windows\CurrentVersion\Authentication\LogonUI\TestHooks. If the testhooks key doesn’t exist, you can simply create a new key under LogonUI.

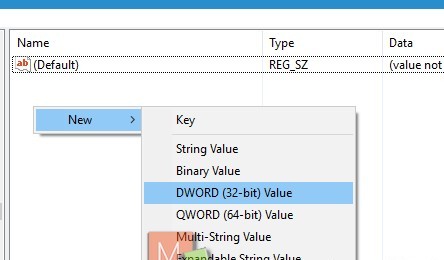
3.In the right panel, right click an empty space, go to New, select DWORD (32-bit) and name it Console Mode.
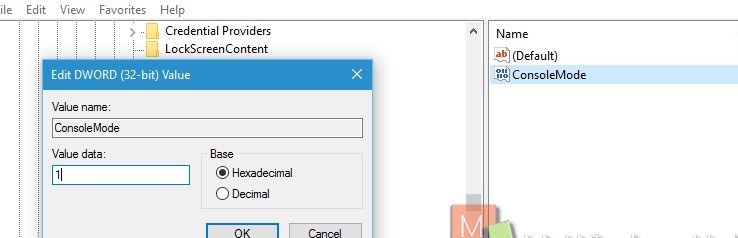
4.Set its value to 1.
5.Then Logout of your System and login again. You will get rid of login screen and lock scree6Now, check if 6.you find a DWORD named as Console Mode.
7. Double click on it and change its value to 1 to enable it.
How To Disable Console Mode in Windows 10:
- Press Win+ R to open Run Window. Type regedit and Press Enter to open Registry Editor.
- Then Search to the following position
- Save the .reg file to your desktop.
- Double click on the downloaded .reg file to merge it.
- If prompted, tap on Run, yes (UAC), yes, and OK t approve the merge.
- If you like, you can delete the download .reg file you like.
- You will see the change the next time you lock the computer or sign in.
- Double click on it and change its value 0 to disable it.
Is Your PC Behaving Abnormal & Needs Instant Optimization?
We recommend you to choose Advanced System Repair Suite which is dedicated to offer complete options to optimize a PC, fix any Windows error, and remove malware threats in easy. The software is award winning and suggested as the best malware fix application supporting all Windows versions including XP/Vista/7/8/8.1/10. Just 3 steps to avail error free PC.
![]()
- Advanced System Repair Tool and install on your PC. (Follow all on screen instructions when installer is executed)
- Click “Scan Your PC” button to scan all present issues, errors, junk files, and malware threats.
- Finally, click “Start Repair” to fix all detected problems in next few minutes.
