

Learn In Detail How To Clear Temp Files In Windows 10 Including All Cache Files Too
There’s probably no doubt why Windows 10 operating system is considered as one of the best operating system. It really deserve the class as it offers great range of compatibility and improved features or functions as well. In order to accomplish its task easily and allow users to get fast and responsive experience while using the Windows 10, the OS actually stores really a significant amount of cache. Even in case if your computer’s overall resources are very high, the performance will even not get compromised if the cache storage amount gets high.
However, in other scenario, if the Windows 10 cache file amount increases, this makes the system running a bit sluggish or slow while being accessed. If you are facing the same issue and consider your system used to run probably faster than what it’s running in current scenario, then increased cache files might be a possible reason. Therefore, you should obviously learn how to clear cache in Windows 10 to assure your system running smoother once again.
So, in order to address the issue caused by a highly increased amount of cache file in Windows operating system, there are a few things your will require to clear on your computer and this article is going to mention all those in step by step guide.
Table of Contents
How To Clear Temp Files In Windows 10
As you just started reading how to clear cache in Windows 10, the very first requirement is to clear the temp files in operating system. In order to perceive this task, get through the steps below:
Step 1: Click on Settings option under Start menu.
Step 2: In various provided options, Select System.
Step 3: Choose Storage in the left pane.
Step 4: Click on Change how we free up space option in the right pane.
Step 5: Hit the option Clean now. This will initiate cleaning the temp files which are unused on computer.
Step 6: Once the cleaning process is completed, the system will show you how much space has been saved after the cleaning process. That’s it.
Steps To Clear Temporary Cached Files on Windows-Computer
After you learned how to clear temp files in Windows 10, next you would require to clean temporary cached files on Windows system, for which the steps include:
Step 1: Click Win + R key combination together to open Run command line.
Step 2: Either type ‘%temp%’ or just copy and paste it. Click the OK button.
Step 3: Now, Click Ctrl + A to select all files shown within the directory, and Press Shift + Del key combined to delete them permanently. Once done, close the directory.
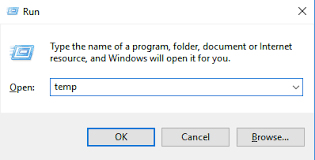
Step 4: Again, Open Run command line and type ‘temp’ or just paste it as earlier. Do remember that temp and %temp%, both are different directory and store temporary files which should be cleaned. So, Click OK button now to open the directory.
Step 5: Select all once again by pressing Ctrl + A and delete them permanently by hitting Shift + Del following by pressing Enter key.
How To Clear Cache In Windows 10: Steps To Clear Prefetch Directory
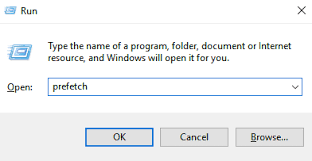
Step 1: Press Win + R key combination to open Run command line and type ‘prefetch’ followed by clicking OK button.
Step 2: Select all files within the directory as instructed earlier.
Step 3: Press Shift + Del key combined then Enter, to delete the files permanently.
Steps To Clean Unnecessary Files Cache On Windows
Within Windows operating system, the system cache generally stores local and downloaded applications for a prompt in order to assure speedy response to users. These cache data gets replaced by new ones as the time goes, but the older ones keep remaining their. So, in the instance if you feel your system performance has gone down, deleting those files might be helpful. Here are the steps to follow:
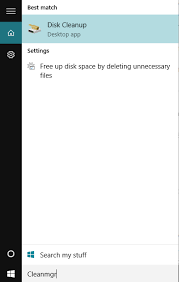
Step 1: Click on Start button and search for ‘cleanmgr’ or ‘disk cleanup’ option.
Step 2: Select the same in the shown search result to open the Disk Cleanup utility in Windows. This utility is basically used to clean unnecessary files in selected drive.
Step 3: In the disk cleanup utility, you can choose all drives one by one to check for unnecessary cache files and clear them.
Step 4: in this step, you would need to select various file kinds you are intended to clean up from computer. In case you want to delete all of them, simply select all.
Step 5: At the bottom of shown Window, click the Clean Up System Files and then Ok to start the cleanup process.
Step 6: The unnecessary system cache files will be now cleaned.
Learn Now How To Clear Cache in Windows 10 For Windows Store Application
You might have heard about Windows Store if you are using Windows 10 as active operating system. This app even use to store a considerable amount of data on computer as it’s being in beta period. So, these files might be the possible culprit to cause your system performance dramatically reduced. So, here you will learn how to clean Windows Store cache files in order to enhance your system performance in more efficient way.
Step 1: Hit Win +R to open Run command line and type ‘WSReset.exe’ followed by clicking OK button. This will clear the Windows store cache files.
Step 2: in order to clean your Location data stored on local drives, select Settings by clicking Start button.
Step 3: Choose Privacy from various shown options.
Step 4: Now, select Location in the left pane.
Step 5: once selected, you will see an option called ‘Clear’ in the right side pane. Hit the button and location data will also be cleared in a few seconds.
Lastly, Here The Steps To Clean DNS Cache On Windows 10
In case your browsing speed seems reduced then flushing your DNS cache stored on Windows 10 can also be helpful. To accomplish this task, follow here mentioned steps:
Step 1: Click on Start button and search for Command Prompt.
Step 2: Select Command Prompt in the shown result, and right click over it to run as administrator.
Step 3: Type ‘ipconfig/flushDNS’, and press Enter key to execute the command.
Step 4: This will clear your DNS cache files stores on computer, and hopefully your browsing speed will be enhanced.
So, overall, you might have enjoyed learning how to clear cache in Windows 10 easily, that merely takes a few minutes. If you liked this article, do share it with your friends and Subscribe Us to stay tuned with more similar tips or tricks and tech articles.
